Drive to Mexico 2020

Our second time driving across the Mexican border was a bit different from the first, even though we used the same crossing – Colombia Solidarity Bridge in Laredo, Texas.

Getting Us Into Mexico

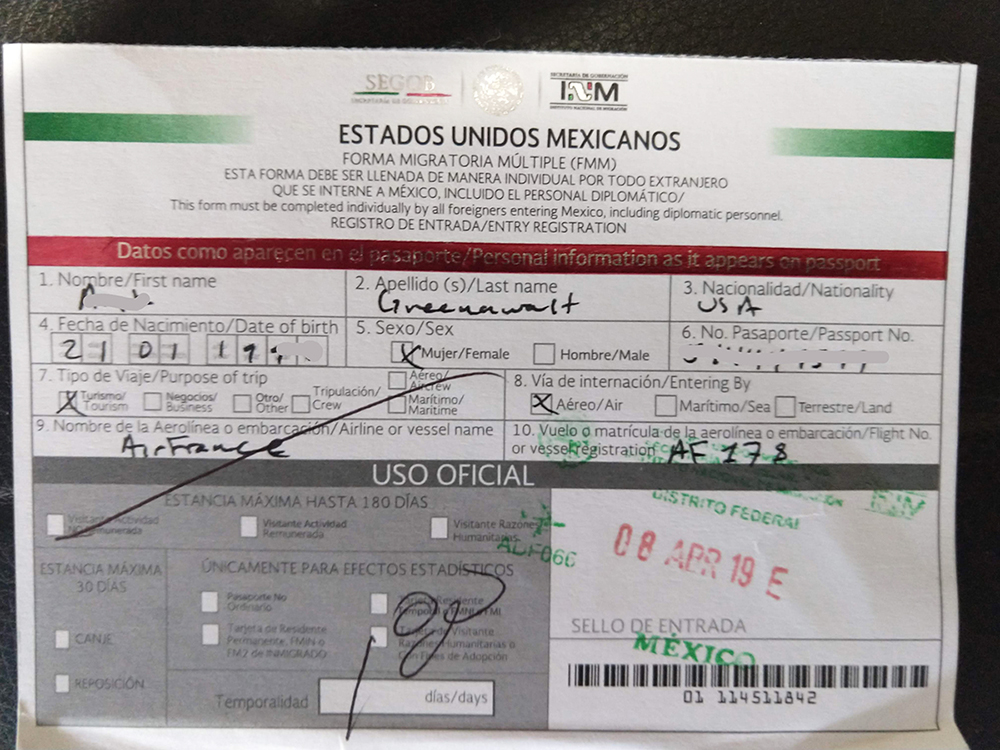
The first time we crossed, in January 2019, we had Mexican Visas, the first step in attaining Temporary Residency in Mexico, because we expected to stay long-term. This time, our Temporary Residencies had accidentally expired because of the extra time we spent in the States taking care of my sick mother, and we knew we are going to stay less than three months, so we entered with Tourist Visas.

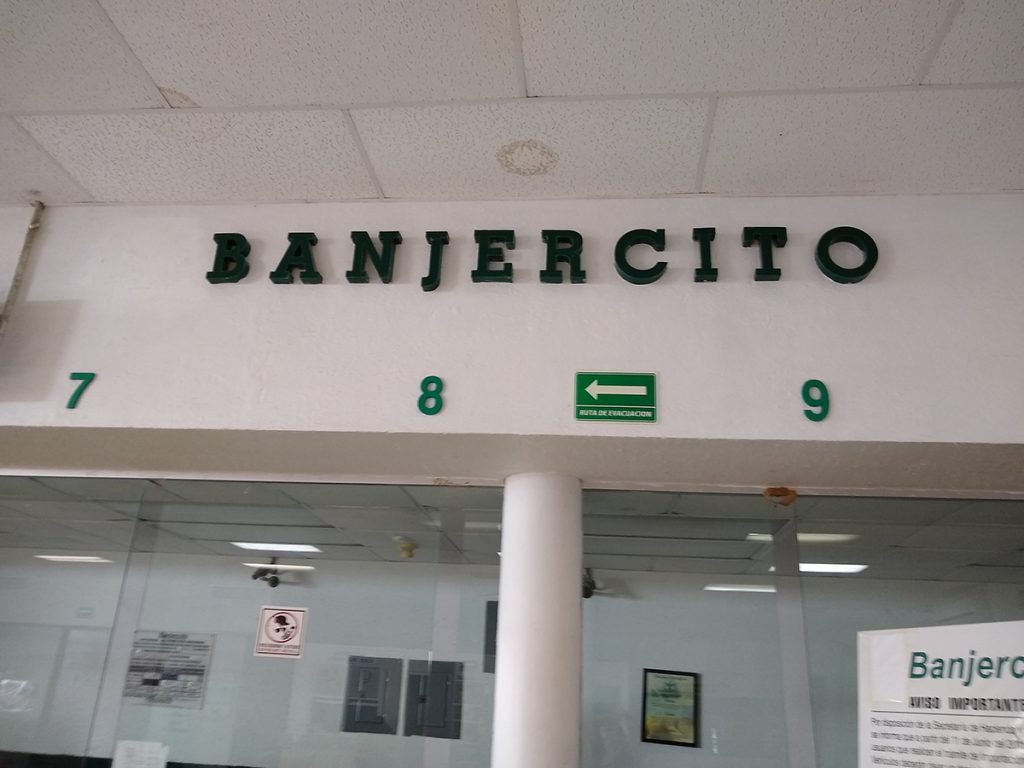
The difference was that this time, we each had to pay a Tourist Visa fee at a cost of $575 MXN, about $39 US. (Note that this fee is included in your airline ticket fee when you fly into Mexico). This entailed the initial stop at Immigration office, a stop to pay at the Banjercito window, and then another stop at Immigration to finalize our paperwork.

Getting our Truck Into Mexico

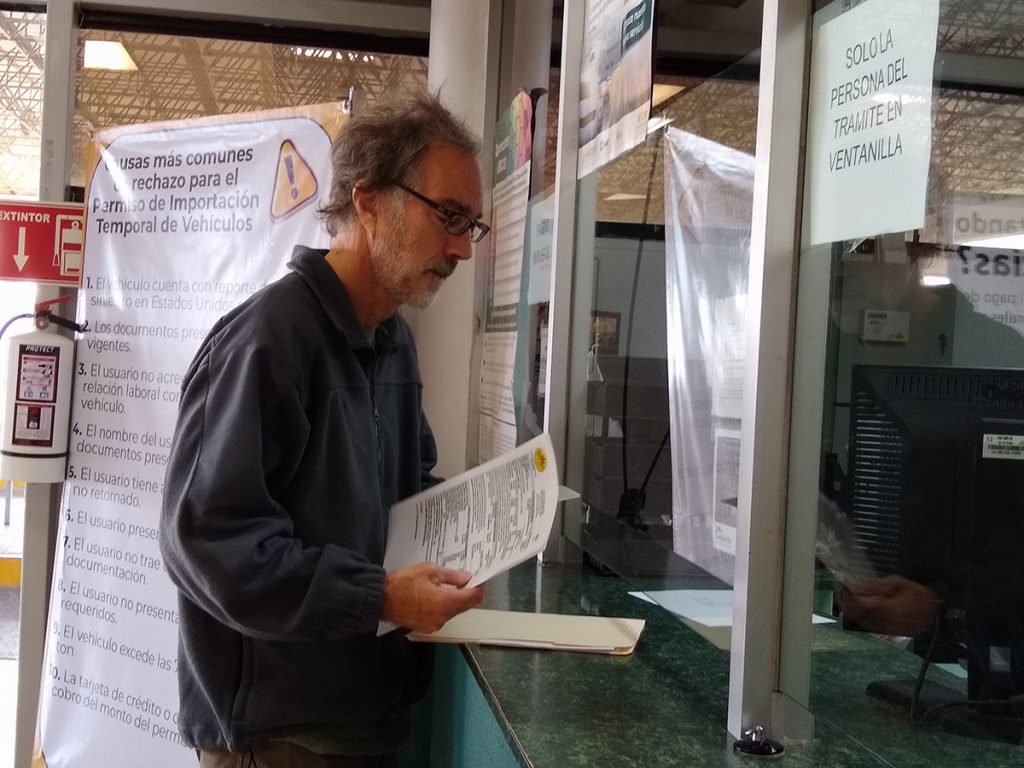
Next, we had to get the Temporary Import Permit for our car. This cost $400 USD, which is supposed to be reimbursed when you leave Mexico, plus a processing fee of approximately $51 USD. I wasn’t as prepared this time as I was previously and I had left copies of my driver’s license and passport buried in a folder in the back of the truck, so we chose to stand in the copy line at the border facility and get those copied.

Registering the truck

Next, we had to drive through Customs. It seemed as if every car was chosen for inspection, and ours was no exception.
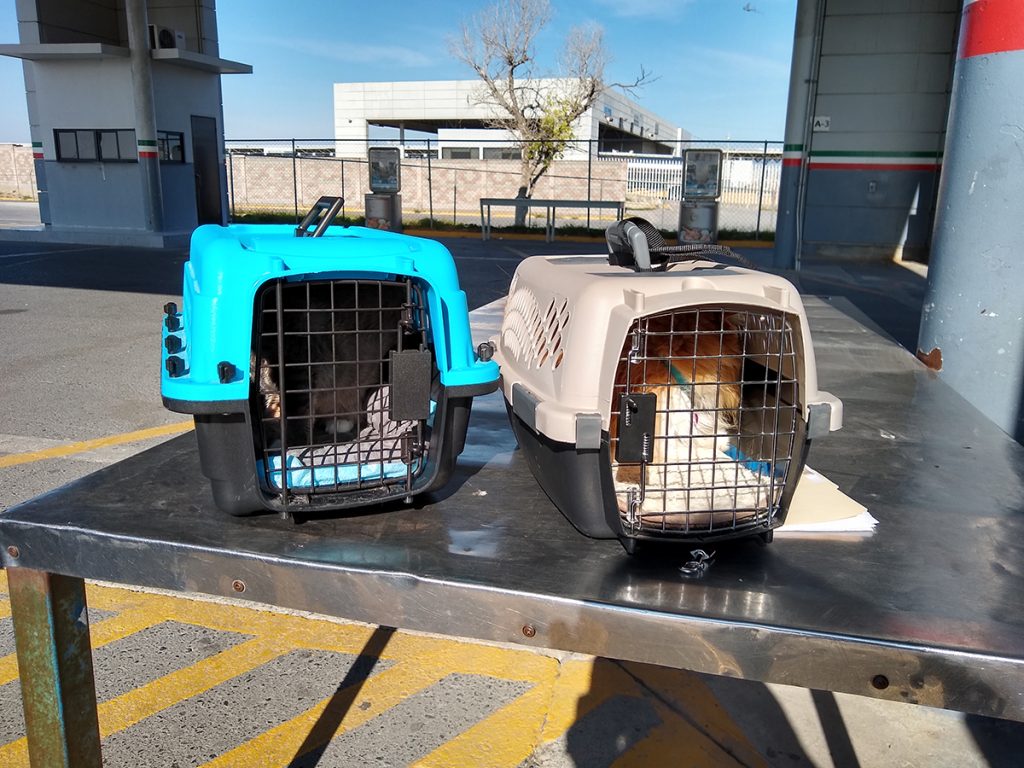
Inspecting the Cats

This time was that they asked for documentation for the cats. We were traveling with only two because Ellie, the third, was now living at Champlain College in Vermont with Gavin, our youngest. Effective January 1, 2020, you no longer need a Certified Health Certificate to bring a cat into Mexico, but they can physically inspect the cats for open sores, health problems, etc., and you need to prove they have rabies vaccines. The Inspector made us pull out the paperwork, which unfortunately was stored in the far reaches of the truck, entailed a near-total unpacking. He very thoroughly reviewed the paperwork.

Noxy and Kaylee patiently waited during the truck inspection

X-Raying the Truck

Next, Lisa and the cats had to get out of the truck while I, once again, drove it through the x-ray machine. Once they reviewed the x-rays, we were free to go.

The truck x-ray machine
Our truck is inside this x-ray machine

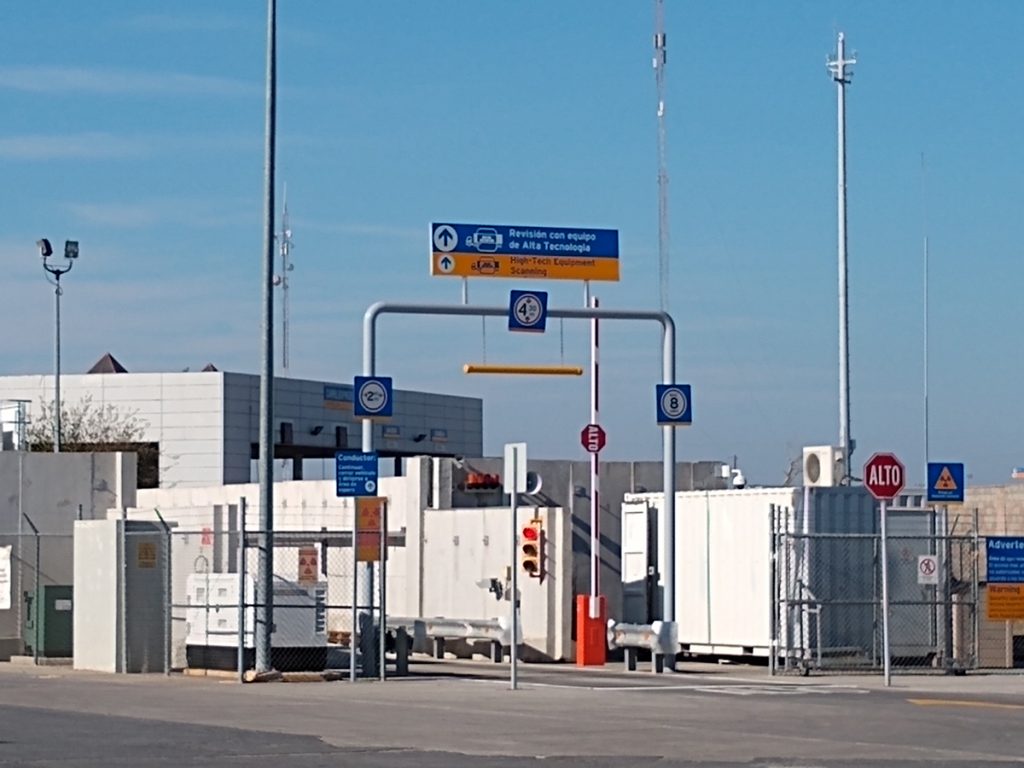
In the end, it took us about 1.5 hours at Mexican Immigration and Customs. Fortunately, there weren’t lines (which is why we like Colombia), or this could have been much longer.

Welcome to Mexico!

And then we were in Mexico! We didn’t take time to celebrate, but pressed forward to get to our first night’s lodging before dark.

Lisa’s favorite sign

We drove about 6 hours to Matehuala, where we had a reservation at the same cat-friendly motel we stayed at last time, Las Palmas Midway Inn in Matehuala.

Our new Garmin GPS seemed to under-estimate our travel time, by about an hour both days. We didn’t run into traffic either day, so that wasn’t the issue. Maybe it was the fact that many of the Mexican roads we drove on incessantly changed speed limits, going anywhere from 110 kph to 60 kph and back. It may be difficult for the GPS to deal with that along with the fact that there may be few people driving those routes and providing route time feedback. It could also be that we drive the speed limit while many Mexican drivers don’t necessarily do that. I don’t really know how the GPS time estimation works, so this is all just a guess.

We love our new Garmin GPS

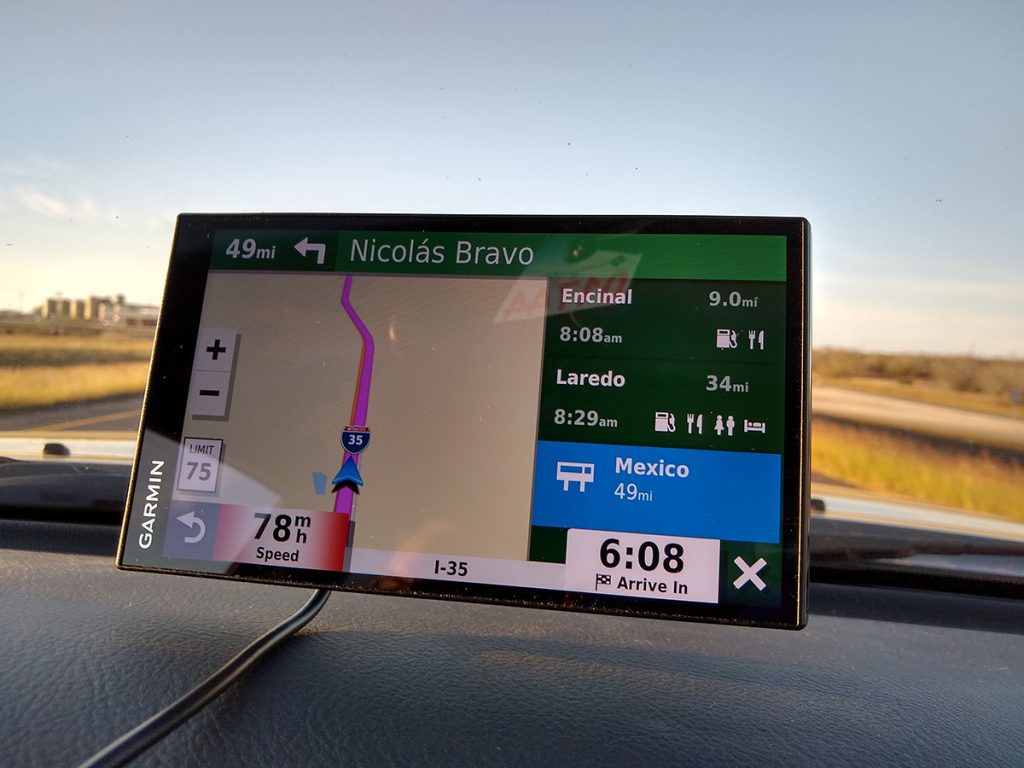
Another thing that may impact the time estimation is the number of toll booths. Overall, we passed through 10 of these booths at a total cost of $924 MXN, or about $50 USD.

Stopped by the Mexican Cops (the Federales)

Finally, the last thing that was different on this trip was we were stopped by the Federal Police on two occasions. The first of these seemed to be more friendly. The second one was at an organized Federal Police checkpoint. Here they pulled over several people and performed inspections. They asked me 3 times if I had weapons or drugs (armas, pistolas, drogas) and then had me open the back of the truck and open selected suitcases, even going to the point of asking me where my shoes were in one of them, which I had to subsequently dig out. They also frisked me. Asking me to empty my pockets, patting me down and having me lift up my pant legs. So, that was a different experience than last time as we weren’t selected for the inspections as we drove through several of those checkpoints before.

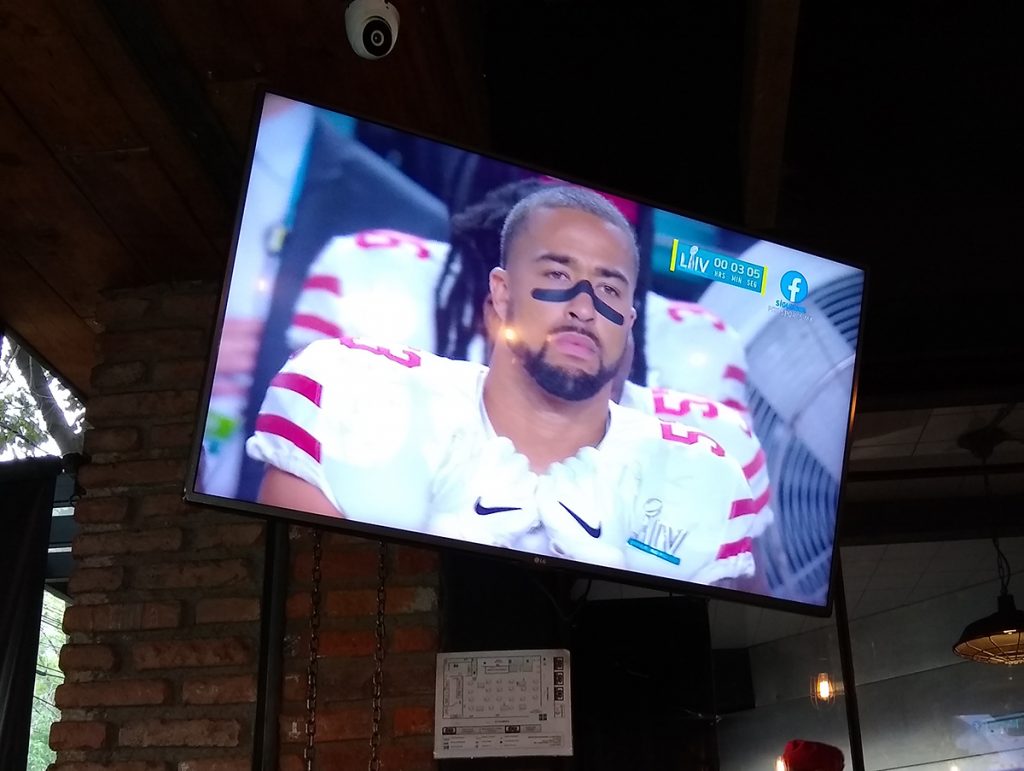
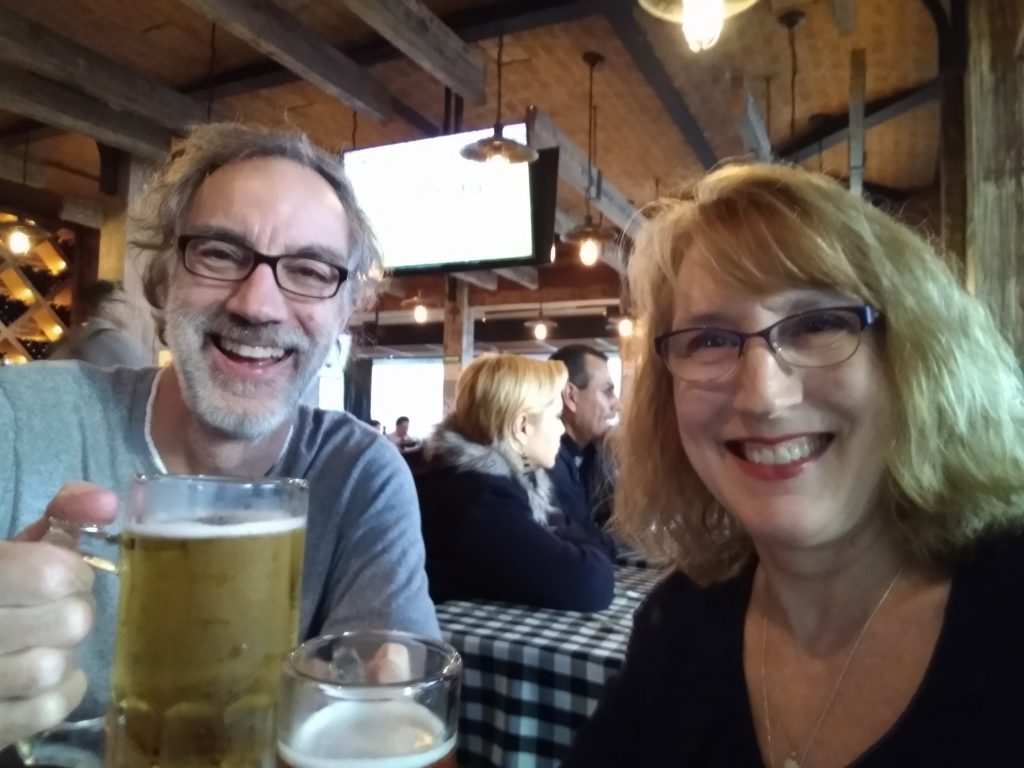
Nonetheless, we arrived in Mexico City with enough time to unload, park the car and find an extremely nice restaurant to have a couple of beers, dinner and watch the Super Bowl (in Spanish).

Getting Our Mexican Temporary Resident (Residente Temporal) Visas – Part 2

Due to the gas crisis that was occurring in Mexico when we
arrived, we were delayed in the city of Leon for a week before finally arriving
in Guadalajara. Then we wanted to jump right in to language school, so it was
almost 3 weeks before we finally made it into the immigration office in
Guadalajara.
Step 3: Visit the
Immigration Office in Mexico
We found the Mexican Immigration page online, downloaded the
in-country immigration forms we needed, and filled them out. We dutifully made copies
of our passports and had more passport photos taken at a (rather pricey) photo
studio in Tlaquepaque. We then arrived at the Immigration office a few minutes
before it opened and showed the greeting staff the forms. They gave us a ticket
and showed us where to sit. We were quickly called up to a window and showed
the woman our paperwork (no English spoken there). She didn’t like my paperwork
since, as I had been warned at the Mexican Consulate in Denver, I needed to use
my full and complete name for everything. (Lisa, who had filled out the online forms,
had not been aware of this.) I was sent to a computer kiosk to refill it, not a
pleasant experience, as everything was in Spanish and a line was forming behind
me. Nonetheless, I was eventually successful. Lisa joined me in the line to
redo hers for another picky reason.
Back at the window, we were given another document that we
needed to immediately take to a bank, where we would pay approximately $200
each, obtain a receipt, and return to Immigration.
Step 4: Pay the Fee at
a Local Bank
We walked a few blocks to find a bank, took a number, and sat
in the waiting area. Mexico is basically a cash society, so people go to banks
with cash to pay their bills – water, electric, cable, phone, and, in our case,
Immigration payments. There’s almost always people waiting in the chairs. When
our number was called, we went to the window and showed the form we were given.
The Immigration woman told us that the receipt we got from the bank had to have
our names EXACTLY as they were on our passports. The bank’s system wouldn’t
allow the hyphen in Lisa’s last name (Hamm-Greenawalt), so she is Lisa Hamm
Greenawalt in Mexico.
Step 5: Back to
Immigration
Returning to the Immigration office, we waited until the
woman who had previously helped us was available, and gave her our receipt. She
took that, along with our copies and the Immigration permit we got at the
border, and told us that we would get an emailed approval in one or two weeks.

Lisa and Lexie got their emails in a week. We emailed it to
Lisa’s Mexican friend in Evergreen, Gabriela, to confirm that the dense
legalistic language in Spanish said we were approved. She said yes!

But mine didn’t arrive until a week later, causing a bit of anxiety.
We were each given an official Mexican identification number called a NUT, for
Numero Unico de Tramite.
But we weren’t finished.
Step 6: Photos and
Fingerprints
We now had to go back to the Immigration office again to get
our fingerprints taken and give them photos, since they deemed that photos we
had submitted earlier in the process were slightly too big. So we got a new set
of photos taken (in the designated “infantil” size), and scheduled to take
another morning off from language school to finish the process.
We again arrived at Immigration right before it opened, got
our tickets and were shown to a different set of seats. Lisa went to one window
and Lexie and I ended up going to another. They accepted Lisa’s photos and took
her fingerprints, giving her one small napkin to get the purple ink off her
fingertips. They also accepted Lexie’s photos, but not mine. They said the
white background, which looked pale gray, was too dark and I needed to get new
photos again.
First we went to the bathrooms to try to scrub the
fingerprint ink off our fingers! In the Men’s Room, a man sprayed my hands with
some solution and gave me paper towels, so I was fairly successful. Lisa and
Lexie didn’t get the same treatment in the Women’s Room so they had to work
harder, and Lexie’s fingerprints were purple for a day or two.

Then we went in search of a nearby place to get photos taken,
found one a couple blocks away, and went back to the Immigration office with
the new pictures. Success!
 Then they told us to
come back in a week for our Temporary Resident (Green) cards.
Step 7: Temporary
residents!
A week later we went back to the Immigration office a third
time. Once again, very efficiently, we got our numbers, got called to the final
issue and signed for our Green Cards.
Finally, six months after the first visit to the Denver
Consulate and 6 weeks after we crossed the border, we held our Mexican Green
Cards in our hot little hands! We were officially Temporary Residents of
Mexico.


Celebrating the success of the process and our new status as temporary Mexican residents!

Getting Our Mexican Temporary Resident (Residente Temporal) Visas – Part I

Whether you realize it or not, every time you visit Mexico you’re required to have a Visitor’s Permit or a Visa. Most people get a Visitor’s Permit, which is the form you fill out on the plane. Included in your ticket price is the $25 fee for this permit, which is valid for 180 days.
Since we planned on staying in Mexico for longer than 180 days, we had to obtain a Visa. We applied for a Temporary Resident (Residente Temporal) visa, which would allow us to stay in Mexico for 1 year (renewal for up to 4 years) and allow us to import our car (a blog post on that at a later time). This Visa requires that we meet certain asset/income requirements: have monthly income equal to 300 days of the Mexican minimum wage or $30,804MX or savings/investments equal to 5,000 days worth of the minimum wage or $513,400MX. The deciding factor for us was that because we wanted to import our car, because we were bringing the cats with us. So we decided on the Temporary Resident Visa instead of the Permanent Resident Visa, which would not allow us to import our car.  
This ended up being a 7-step process for us.
Step 1: Denver
We started in the Mexican Consulate in Denver. We knew that once we the Visa was issued, we would have to cross into Mexico within 6 months. Since we knew that we would be traveling for several months, and to allow for any unforeseen issues, we thought that getting the Visas in August would be good for our planned January entry to Mexico. I had read about other people merely walking into consulates to start the process. Therefore, about a week before I wanted to go to the consulate, I went to check on the consulate hours so we could get there first thing in the morning. To my complete surprise, I discovered the Mexican Consulate in Denver only processed Visa applications by appointment. To make matters worse, they only had 3 available slots in mid-September, very close to when we were planning to leave Denver. They weren’t together, but we grabbed them, signing up online and printing the forms we needed for our appointments.
Lexie and I had our appointments on the same day. It was a bit of a culture shock at the consulate, as everyone spoke Spanish and we didn’t (yet). We were shown some chairs to sit in and watched the very orderly process of Mexicans taking care of their business at multiple bank teller-like windows. A woman came out and took Lexie and me into a back room. She couldn’t find my appointment and subsequently taught me a very valuable lesson – I needed to include my full name on everything Mexican. That includes my middle name, Keefer, and my suffix, III. She took my financial verification data and sent us back out to pay our $36 Visa fees while she found my appointment and verified the info I had given her. Because I had given my full name on the online form, she needed to create a completely new appointment with the full information. This made the process take longer than it should have. She was extraordinarily nice, and fortunately spoke English. We got our mug-shot photos taken and signed some unknown forms, then called back into the office 20 or so minutes later and given back our passports, which now had the Visas in them.

Lisa went to the consulate 10 days later and came home with her Visa. (Note that different Consulates have different procedures and requirements than what we experienced in Denver. Check your local Consulate!)

Step 2: Border Crossing
The second step of our process came when we crossed the border into Mexico in January. We knew we couldn’t get the normal tourist permit, which would invalidate our Visa. Therefore, we very carefully showed our Visas and made sure that our immigration form was marked accurately, giving us 30 days to visit the Immigration office in Guadalajara.

Lexie filling out her paperwork

This is the form we needed to have marked correctly

Next … Part 2, The Mexican part!

Crossing the Mexican Border

(A look back at the border crossing experience, or Why We Were Stuck in Laredo for Two Days)
I was a little concerned about crossing the Mexican border. I knew there were several things that needed to be done in order to successfully enter Mexico, and I wasn’t exactly sure how, or where, to do them. I was particularly worried that we didn’t have the documentation we would need for our relatively new car. Finally, I was concerned about how long the lines at the border, because we had nearly a 7-hour drive to our first stop, and we had been cautioned not to drive in Mexico after dark.
I had read that most Americans heading to the Guadalajara area from the eastern US used one of the Laredo, Texas, border crossings. Many used the somewhat out-of-the-way Colombia Bridge crossing, which doesn’t have as much traffic as some of the others. It is not a 24-hour crossing, so our plan was to get there when it opened at 8AM.

The First Attempt

We arrived at the border at 8:15 AM, paid $3.50 USD to cross the bridge and we were in Mexico – almost. I had found very little information on the layout of the border crossing, but I knew we needed to visit Immigration and the Banerjcito (the import office) so we could temporarily import our car, which is a requirement if you want to take your car past the “free zone” the first 20 km or so inside  Mexico. Therefore, I was ecstatic when I immediately saw the Banerjcito and an empty parking lot. 
Empty parking lot

 We took our paperwork and went directly to the window inside. I knew they needed the car registration and/or car title. What I was concerned about, though, was that we only had a temporary vehicle registration paper from Vermont.

Getting rejected at the window
Here’s why: Our car was totaled in August and we had to get a new (used) vehicle less than a month before leaving Colorado. Our Colorado paperwork had not yet been processed by the time we left in September. In fact, the processing was so slow that we had to get the car dealership to send it to Lisa’s brother in Virginia, where we parked our car during our European trip, and it took so long that we needed an extension. We needed that paperwork so we could either fly back to Colorado to process it at DMV, or ask someone to perform the unenviable task of going to DMV for us.
Our second option was to register the car in Vermont, where we own a couple of vacation rental properties and where we were staying for a month. 
We decided to go the Vermont route for convenience sake, in early December. Unfortunately, only after they took my Colorado title did I find out that it would take them 4-6 weeks to process the paperwork and issue our car registration document. We had over 5 weeks, so I thought we were still in good shape. When it didn’t arrive, I was concerned but was still hopeful that Mexico would accept our temporary registration. 
They didn’t!

Rejected at the Border: Now What?

We turned around, crossed the bridge back into the US and cleared US customs. We had been in Mexico, but not really. We left thinking we were at the mercy of the Vermont DMV, something you don’t want to be. We decided to take a chance and call, and learned that our registration had been sent to our Colorado mailing address, but the address they used didn’t include our box number, so it was returned, where it was just sitting in our file. It would have to be resent. Could it be emailed? We don’t do that, said the man in the DMV office. FedExed? We don’t do that, droned the man in the DMV office. 
So what could we do for the next week while we waited for the registration to be snail mailed to our Colorado address, processed by our traveling mailbox, and then mailed to us? And where would it be mailed to, anyway? We had checked out of our hotel and our truck doesn’t have a mailbox.

Regrouping at McDonald’s

We went back to Laredo and regrouped at a McDonald’s, sitting in a corner booth with coffee and a computer. connected to the free Wifi. Looking out the window, we noticed a UPS Store across the parking lot. We dashed over, had a chat with the counter worker, and found out we could use their address to accept a Fed Ex. Newly energized, we returned to McD’s. While Lisa went online looking for a  pet-friendly place to stay for a couple nights, I pulled out a cellphone and called Vermont DMV again, this time determined to talk with a supervisor. 
Working in McD’s on lodging and getting that registration
However, a kind woman named Diane Hedding answered and immediately offered to help us. All we needed to do was to send her a prepaid shipping label and she would personally take our registration to the mail center and Fed-Ex it to us. She gave us her personal email address, and then sent us a note when she dropped off the package. We found a Laredo Airbnb for the next couple nights and waited for our package to arrive.

The Second Attempt

At 10:30 AM on Saturday, Jan. 11, we had our registration in hand! 
Registration!
We moved out of the apartment, packed up cats and luggage, and headed to the border. After paying another $3.50 to cross the Colombia Bridge, we confidently walked up to the Banjercito window. Just one person was in front of us, and the woman at the counter remembered us! This time they told us we needed to go to Immigration first, as they needed our immigration form to process the import.
 

Bob filling out the paperwork

Lisa filling forms

Lexie, too

We went over to Immigration, again no line, filled out the forms, showed them our Mexican Temporary Resident visas in our passports, and were processed. The immigration form was the same one was had always gotten when flying into Mexico, but there were several boxes that needed to be properly checked. This was done and we were now on a 30-day clock to get into Mexico, get to an in-country immigration office and finish up our Temporary Resident visa requirements.
Back to the Banjercito, still no line, they processed our paperwork, took a $400 deposit, (which will be returned when we take the car out of the country), gave us a sticker for our car and allowed us to proceed.

Getting Through Customs

Next up was Customs. We knew, with our luck, we would get selected for a complete car search. And, true to form we were selected. They didn’t want to see the International Health Certificates we had for the cats, but they did question me several times regarding firearms, alcohol and cigarettes. Next, they looked at what we had in the car and decided to X-ray it, which was probably better than taking everything out. This required humans and cats to get out of the car. I drove the car over to the X-ray area, where I was escorted behind a barrier and a movable X-ray device transited the length of our car, scanning it thoroughly. 
I drove back to where Lisa, Lexie and the cats were waiting, and in a couple of minutes, they told us we were good to go. After strapping the cats back in and getting our bearings, we crossed the border! Then we were officially off and driving in Mexico toward Tlaquepaque. It had taken us one and a half hours at the border crossing. That process would have taken much, much longer during busy season, so I felt extremely lucky that we were finally on our way!
WELCOME TO MEXICO!

Mexico Visa Day

(Written in September 2018) 

Today, Lexie and I got our Mexican Visas. Normally, when you go to Mexico on vacation, you automatically receive a visa that is good for 180 days. Since we will be staying longer than that, we needed to get a Temporary Resident Visa that is good for 1 year and renewable for up to 4 years.
To receive that visa, we needed to make copies of birth certificates and passports, create a letter in Spanish detailing our Mexican address, get passport photos, and have documentation that proves that we can financially support ourselves when we get there.
Once you get the visa in the US from a Mexican consulate, you have 6 months to enter Mexico and then another 30 days to finish up the requirements in Mexico.

Since I had read about other people going to their local consulate and getting their visa, I began the process in August, five months before our scheduled arrival in Mexico, and blocked off a day to spend waiting in an endless line waiting to be processed.

When I researched our local Denver consulate, I discovered that they only processed visas by appointment and that the only appointments available before we left were in September, during the week we were planning on packing and moving. The only other alternative was to wait until we were back east and then spend a day traveling to the consulate in Philadelphia and waiting in an endless line there. We decided to get the appointment in Denver. They had 2 appointments available one day and then another 3 days later. We took them.

The process was very smooth and organized. They took Lexie’s and my documentation, we paid our fee, got photographed and finger printed and got our visas.

It did take a bit longer than it should have because of a mistake I made when signing up for the appointments. I’m pretty loose with my name. I almost never use my middle name or initial and rarely use the suffix. Because I only used my first and last name when signing up for the appointment online, when they took my passport they couldn’t find me in their system because the Robert Greenawalt who signed up was not the same person whose passport they had, which also had a middle name and III at the end. After they informed me that I always had to use my full name when in Mexico, the consulate person re-entered my name and got us our visas. Total time was 3 ½ hours, including driving and a stop to get Lexie’s passport photo. Not bad!

Lexie and I are ready to go. Lisa will get hers in a few days.

(Postscript: Thanks to Bob’s experience, Lisa had her middle name on all paperwork and the process took less than an hour. She notes that they do their best to make you look as unattractive as possible in the photo. Remove glasses. Push hair behind ears and off forehead. Don’t smile. Consequently, this is the mug shot to end all mug shots.) 

Social media & sharing icons powered by UltimatelySocial
Facebook
Instagram
YouTube
Twitter
Pinterest